Reclaim Your Privacy!
Talk to friends, browse websites, post on forums, and publish files within Freenet with strong privacy protections.
-
Secret Identities
Create yours so you can speak more freely
-
Browse Websites
Freenet is home to sites ranging from programming to sustainable living
-
Forums
Ask questions and exchange ideas
-
Platform
Build your own decentralized application on the Freenet platform
What’s New
News about Freenet, internet freedom and privacy rights.
-
Freenet build 1491 released, platform support
2021-05-08
Freenet 0.7.5 build 1491, codename “platform support”, is now available. Download Freenet This build is a bugfix release that improves operation on different platforms and with different local setup.It ships cleanups to the pitch black defense and to…
-
Freenet build 1490 released
2021-04-01
Freenet 0.7.5 build 1490 codename “pitch black streaming” is now available. Download Freenet Freenet 0.7.5 build 1490 is now available.This release provides three different changes: streaming in the browser,mitigating the pitch black attack,…
-
Freenet build 1489 released
2020-12-21
Freenet 0.7.5 build 1489 codename “solstice” is now available. Download Freenet This release adds an m3u-filter that enables safe access to m3u-playlists. Together with the existing support for media files (Audio using mp3, Ogg Vorbis, or Flac, and…
-
Freenet build 1488 released
2020-11-14
Freenet 0.7.5 build 1488 is now available.This build improves translations to make Freenet more inviting for people around the world: update French, add Hungarian.For additional details see the release tag for 1488.You can download this release as…
Why we do this
I worry about my child and the Internet all the time, even though she’s too young to have logged on yet. Here’s what I worry about. I worry that 10 or 15 years from now, she will come to me and say
Daddy, where were you when they took freedom of the press away from the Internet
Documentation
The documentation on Freenet is forever changing, since this is a project in development. However, here under the Documentation menu, you may find usage documents on how to setup Freenet and use the most popular Freenet tools as well as a user driven Wiki and an extensive Frequently Asked Questions department.
- Install Contains detailed instructions on how to install Freenet using the new installer.
- Connect How to connect to Freenet.
- Content Freenet as a Content Distribution System.
- Understand Explains the workings of Freenet, and a glossary with the most frequently used terms.
- Social How to setup email, forums and microblogging over Freenet.
- jSite jSite is a Freenet website (a.k.a. Freesite) insertion tool.
- Wiki The Freenet Wiki is a user driven space where new features may be described before finding their way into the website. It is a good source of information about all sorts of Freenet related issues.
Install
To install Freenet might not be as difficult as you might have heard. There are three ways to install Freenet:
- Graphical install
- Headless install
If you want to install the Freenet software on a computer which lacks a GUI, see the Headless install instructions.
Graphical install
The information below does not apply to Windows systems. For Windows you should use the installer for Windows as described on the download page.
For a graphical installation you have to have:
- a working Java Runtime Environment
- a downloaded copy of
new_installer_offline.jarfrom the download page - a working graphical user interface (GUI)
You should save the new_installer.jar file somewhere where you can find it again. Your home-directory should be a good place. The next step requires you to know where you stored the file (the path to it), so it is quite important that you do that step thoroughly.
To start the installation, open a command line interface/terminal/shell window. Exchange the /path/to to the real path (for example: /home/username/download/new_installer.jar) to the new_installer.jar-file and type:
$ java -jar /path/to/new_installer_offline.jar
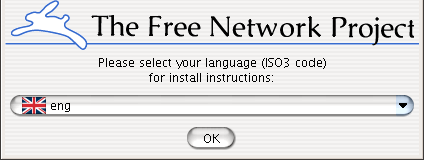
The first window you should see is the one below, which allows you to select your preferred language for the installation program.
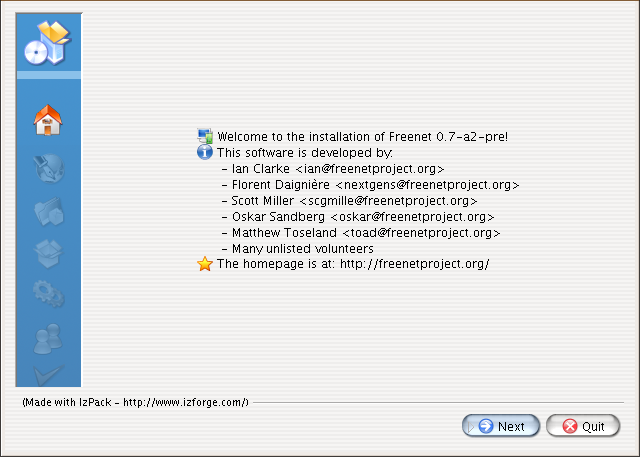
Next is shown an about-box, some information about the version of Freenet and authors. Just click Next to proceed.
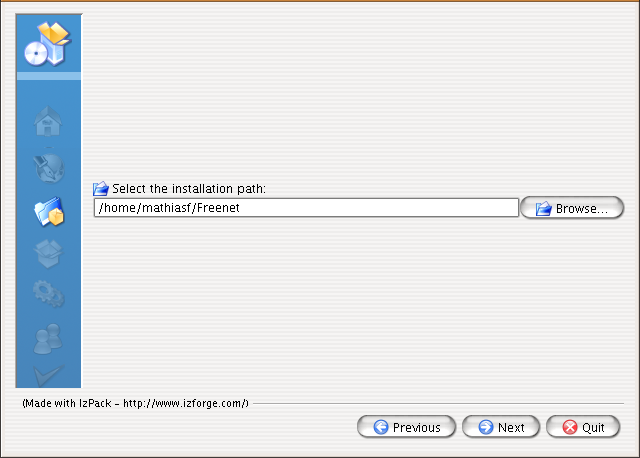
The next step is to choose the directory in which to install Freenet. The default location on GNU/Linux & POSIX operating systems is /home/username/Freenet as shown below. Change it to something appropriate or leave “as is”. Click Next when you are finished.
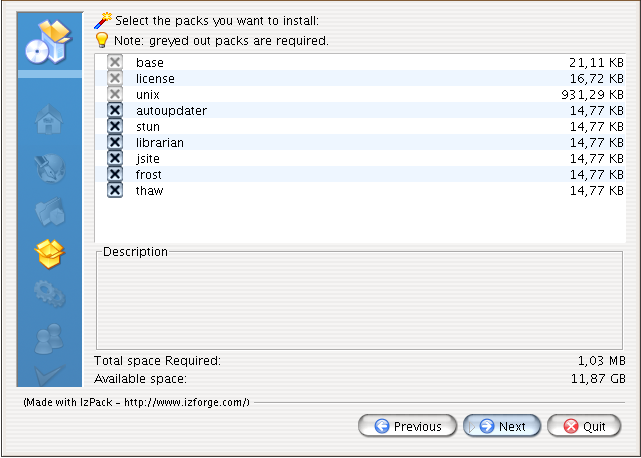
Select the packages that you want to install with your Freenet software. Since it takes up virtually no extra disk-space, it is recommended that you leave all packages selected and press Next.
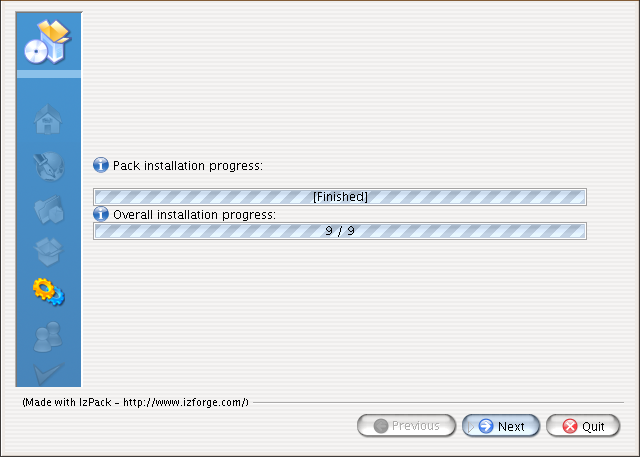
In the next stage, the packages are installed, and a progress meter runs across the window. When it is finished, press Next to continue to the next step.
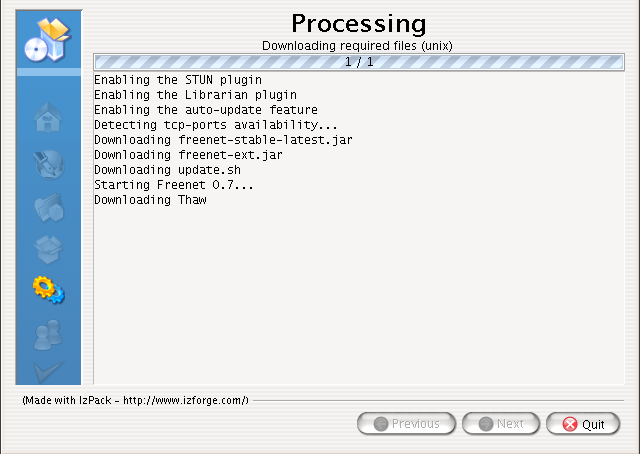
After that, the Freenet software is installed and/or upgraded, plugins are enabled and the environment is started. When completed, press Next to proceed.
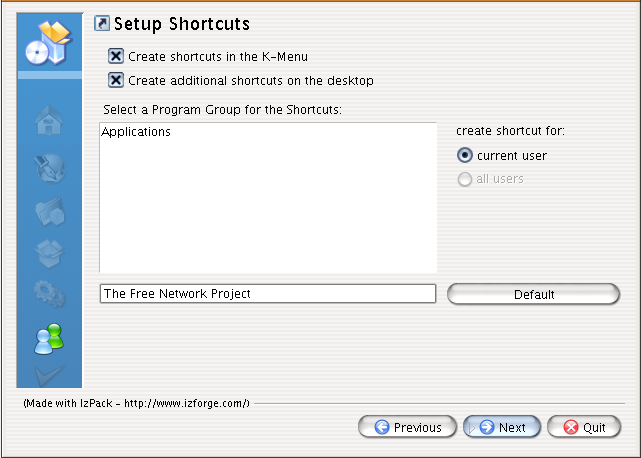
For some graphical environments, shortcuts in the menu-structure can be created. This is not the case for all of the platforms that Freenet run on. However, there should be created shortcuts on the desktop in all supported environments. Change the application group according to your needs and press Next when finished.
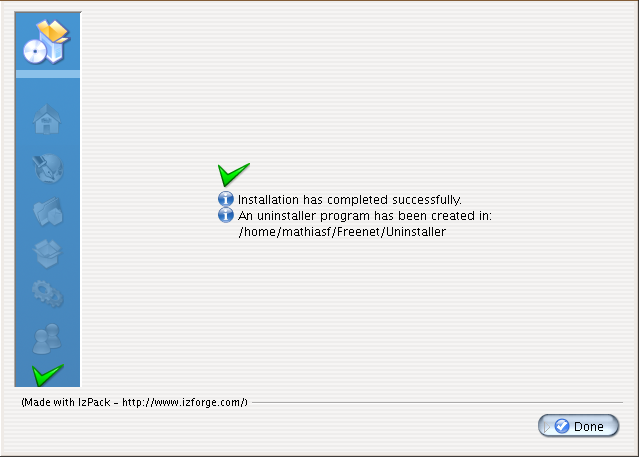
After that, the installation is finished. Click Done to close the window.
If all has gone well, a browser window should have opened in the background. This will ask you a bunch of questions to configure Freenet, and then you should be able to use it.
It will ask about network security level – “protection from strangers attacking you over the internet”. If you choose LOW or NORMAL, Freenet should “just work”, connecting in a few minutes. If you choose HIGH or MAXIMUM, Freenet will need you to add friends before you can use it. These must be people you personally know. Adding people you don’t know will not improve security.
Connect
There are two ways to connect to Freenet:
- You can enable insecure mode (the installation wizard will ask you) and Freenet will automatically find nodes to connect to – Strangers.
- You can connect to nodes run by people you know – Friends. Note that these should be people you actually know on some level, in order to maintain good network topology and maximum security.
In practice, you should probably use both of these options, unless you are really paranoid, in which case you should of course only connect to people you trust. Insecure mode should work automatically once enabled, so the rest of this page is about connecting to Friends.
To connect to your friends’ nodes, you have to exchange Node references with them. The references must be added on both sides to be established. That is, you need to add his/hers, and he/she needs to add yours.
When you have a freshly connected node, you have no data cached in your datastore, and very few connections even if insecure mode is enabled. Requests are sent out in a random fashion. This makes some (or all) requests time out before retrieving anything. It takes a couple of days for your Freenet node to get up to speed, so please don’t get discouraged by this.
You should have at least three nodes that are connected to you at all times, ideally at least five to seven. Since some nodes may be unreachable at times, you need to connect to some more nodes to get the expected number. The nodes that are connected directly to you are the only nodes on Freenet that might see what kind of traffic passes through to your Freenet node. But if insecure mode is enabled, any node can find yours; this is the big advantage of not enabling insecure mode: you are effectively invisible except to your friends. In practice most people start off with insecure mode and gradually add friends, and hopefully turn off insecure mode once they have at least 10 friends.
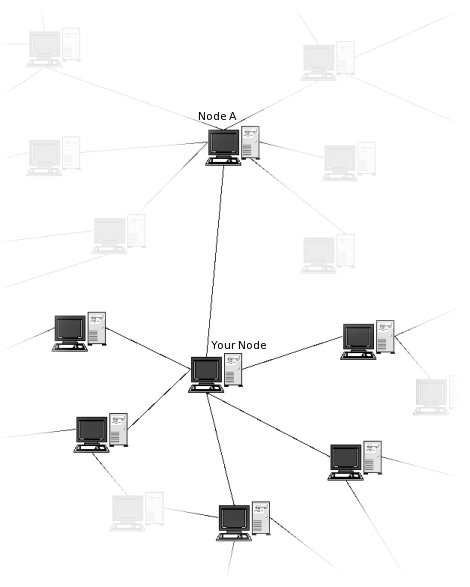
Figure 1: Visible Freenet connections
Node A in the figure also has a number of nodes connected to it, but they are all (except from your own node) invisible to you. The traffic routing algorithm is therefore only able to direct traffic to one of the few nodes that you know of that it thinks is most able to find what you are looking for.
The traffic is encrypted, so it is quite difficult for the nodes that you connect to to see what your Freenet traffic consists of, but it is far from impossible. It is therefore important that you connect only to people you know. If that is not possible, then at least people you’ve talked to.
There are a number of ways to add peer node references.
Fproxy
Connecting peer nodes with FProxy can be done in several ways. Common for all these are that they are all done under the Darknet menu item or using the http://127.0.0.1:8888/friends/ link. Below is the thing that makes it all happen:
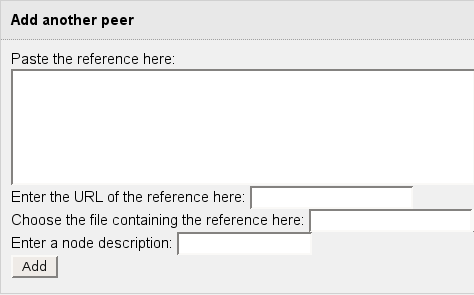
As you can see, there are three ways of getting a node reference from someone else:
- Pasting it “as is”, in the top field,
- a URL pointing at the reference, or
- a file, containing the reference.
http://dark-code.bulix.org/ is a so called paste-bin, where you can add your node reference, make sure that the private box is checked, and press Paste.
The paste-bin then returns an URL (e.g. http://dark-code.bulix.org/yuf01h-34676?raw), which can be shared with others. Make sure that you add ?raw to the link. This makes the link point only to the actual pasted data, with no extra design elements.
Your own Freenet reference can be found on the http://127.0.0.1:8888/friends/ page, under the caption My Node Reference. It might look something like this (cut to fit on the screen):
lastGoodVersion=Fred,0.7,1.0,1010
sig=7c7edc8c5250e42ac4cb161b216b70de7019221f1b331f0f92bd67439[...]609660f0d4
identity=5tBtS3R59nfOTvc1be~V0sSfkWir8EW38YeocP0gsYM
myName=FreenetTestInstall
location=0.02970997399122577
testnet=false
version=Fred,0.7,1.0,1016
physical.udp=83.255.75.223:13762
ark.pubURI=SSK@M1wjFha2tujYo50QQF~5Fqz5anVEiIzI9VrA8IrhAsQ,5M[...],AQACAAE/ark
ark.number=0
dsaPubKey.y=JhlWYVx8rA0y0x1Fb3y9TfqXDYiIsnkEka8PLsePerpCELTIn[...]laHe2bkl0O7Dg
dsaGroup.p=AIYIrE9VNhM38qPjirGGT-PJjWZBHY0q-JxSYyDFQfZQeOhrx4[...]ofeLdX7xhehuk
dsaGroup.g=UaRatnDByf0QvTlaaAXTMzn1Z15LDTXe-J~gOqXCv0zpz83CVn[...]Fuqt8yZe1PDVg
dsaGroup.q=ALFDNoq81R9Y1kQNVBc5kzmk0VvvCWosXY5t9E9S1tN5
End
Remember that both you and the node you are connecting to must add references to make the connection work. This means that if you add a persons node reference on your side, but that person does not add your reference on his/her side, the connection does not work.
Darknet peers
When you have a number of connections, you can visit the Darknet page. It should look something like this:
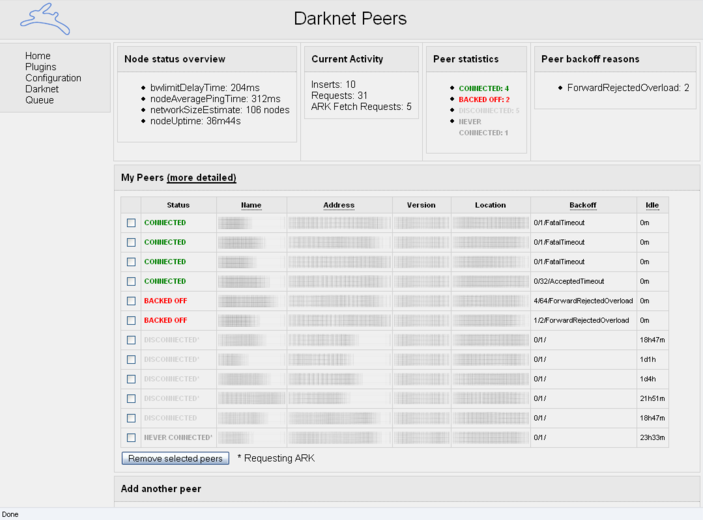
There are a number of status messages that can be seen here:
- CONNECTED – the node is connected and ready to take your request
- BACKED OFF – the node is choked with traffic and unable to respond
- DISCONNECTED – the node is not connected to your node, and probably turned off
- NEVER CONNECTED – the connection between the nodes has not been established. This can be because of firewall problems/restrictions, one side not adding the other sides node reference or that the nodes have not been online at the same time yet in order to confirm the connection. If the problem persists over a long time and both sides have added each other, try to redo the connection.
In the Idle column, you can see how much time has passed since the last status message.
Content
In addition to its anonymity features, as a content distribution network Freenet has the following strengths:
- Totally decentralized
Information can be inserted into Freenet for download without any reliance on a centralized server. All the inserter needs to do is give the content’s “key” to someone else and they will be able to download it. - Adaptive caching
Many CDN architectures only allow peers which have already downloaded a file to share it with other peers. Freenet will adaptively cache information on peers as necessary to meet demand regardless of what that peer has downloaded. This allows Freenet to “scale-up” much more quickly than most solutions for popular files, and improves load-balancing. - Strong Security
Freenet has long-supported the concept of “Content Hash Keys” which guarantee the integrity of retrieved data. This approach has since been adopted by other architectures. Freenet also supports “Signed Subspace Keys” which allow content to be digitally signed. This also allows content integrity to be guaranteed, but is more flexible than CHKs. - Forward Error Correction
In common with some other CDN architectures, Freenet employs “Forward Error Correction”, which allows a file to be reconstructed even if some of the parts of that file can’t be retrieved. Uniquely, Freenet also supports “healing”, which involves the reconstruction and reinsertion of missing file components.
This page contains links to freely available content on Freenet. If you would like to add a new link please get in touch! remember that we will only link to content that can be legally distributed in the United States of America.
Understand
Freenet can be thought of as a large storage device. When you store a file in it, you receive a key which can be used to retrieve the file. When you supply Freenet with a key, it returns the appropriate file (if it is located). The storage space is distributed among all connected nodes on Freenet.
Freenet is a peer-to-peer network which is both decentralized and anonymized. The nodes that you connect to only know their nearest neighbours and have no idea about how the network as a whole is structured.
Small world network
Freenet is built on the principle of small world networks. By connecting to nodes of people you already know, and the people you know in turn connect to people they know, one should be able to reach all nodes in a Freenet network.
The datastore
All Freenet nodes contribute a part of their hard drive space to store encrypted pieces of files. They are stored in the datastore directory in the Freenet installation directory.
Unlike other peer-to-peer networks, you as a user have little or no control over what is stored in your datastore. Instead, files are kept or deleted depending on how popular they are. This allows Freenet to be censorship-resistant. There is no “delete file” operation.
It is hard, but not impossible, to determine what the encrypted file pieces stored in your local Freenet datastore are part of. This allows plausible deniability.
Freenet suggests an initial size based on how much space is available, and you can change the store size at any time. A larger store uses more RAM, but makes for better browsing for you and helps Freenet as a whole.
Freenet Routing
Initially, each node has no information about the performance of the other nodes it knows about. This means that routing of requests is essentially random. But since different nodes have different randomness, they will disagree about where to send a request, given a key. So the data in a newly-started Freenet will be distributed somewhat randomly.
As more documents are inserted by the same node, they will begin to cluster with data items whose keys (see below) are similar, because the same routing rules are used for all of them. More importantly, as data items and requests from different nodes “cross paths”, they will begin to share clustering information as well.
The result is that the network will self-organize into a distributed, clustered structure where nodes tend to hold data items that are close together in key space. There will probably be multiple such clusters throughout the network, any given document being replicated numerous times, depending on how much it is used.
Freenet keys
Each file that exists on Freenet has a key associated with it. Freenet 0.7 has various types of keys. Keys are used for everything on Freenet, and are a kind of URI ( e.g. freenet:=KSK@sample.txt).
Most keys are hashes: there is no notion of semantic closeness when speaking of key closeness. Therefore there will be no correlation between key closeness and similar popularity of data as there might be if keys did exhibit some semantic meaning, thus avoiding bottlenecks caused by popular subjects.
Accessing data
To access a particular piece of data on Freenet, you can use FProxy. You need to know the key to the data, and enter it like this (or click a link containing the key):
http://localhost:8888/[Freenet Key]
There are four types of keys in Freenet:
- CHK – Content Hash Keys
- SSK – Signed Subspace Keys
- USK – Updatable Subspace Keys
- KSK – Keyword Signed Keys
CHKs are the most fundamental. All files over 1kB are ultimately divided into one or more 32kB CHKs. CHKs’ filenames are determined only by their contents. SSKs are the other basic type. These combine a public key with a human-readable filename and therefore allow for freesites. KSKs are a variant of SSKs where everything is determined by a simple human readable filename ( e.g. =KSK@sample.txt). These are spammable but convenient in some cases. And USKs are a form of updatable keys especially useful for freesites and Address Resolution Keys.
An Address Resolution Key (ARK) is an Updatable Subspace Key (USK) inserted by the node whenever its IP address changes. It contains the reference for the node – its cryptographic details, and in particular its IP address(es). ARKs are a way to help people connect to Freenet if they have problems caused by firewalls, routers or changing IP addresses. If someone cannot accept incoming traffic it can make it difficult to connect.
ARKs are an implementation detail and you don’t need to know anything about them to use Freenet.
Content Hash Keys
Content Hash Keys are for files with static content, like an .mp3 or a PDF-document. These keys are hashes of the content of the file. A hash is a reproducible method of turning a specific piece of data into a relatively small number that serve as a sort of fingerprint for the data. If the file content changes, even ever so little, the hash of the file changes radically. This makes the data hard to tamper with without anyone noticing. A CHK uniquely identifies a file, it should not be possible for two files with different content to have the same CHK. The CHK consists of three parts:
- the hash for the file
- the decryption key that unlocks the file, and
- the cryptographic settings used
A typical CHK key looks like this:
CHK@file hash,decryption key,crypto settings
or for example:
CHK@SVbD9~HM5nzf3AX4yFCBc-A4dhNUF5DPJZLL5NX5Brs,bA7qLNJR7IXRKn6uS5PAySjIM6azPFvK~18kSi6bbNQ,AAEA--8
The decryption key is part of the key for the file, and is not included in requests for the file’s pieces. It is thus not possible to decrypt the file without the CHK key.
To access the file, the whole key must be pasted behind the FProxy address (cut to fit screen):
http://localhost:8888/CHK@SVbD9~[..]X5Brs,bA7qLN[..]Si6bbNQ,AAEA--8
Signed Subspace Keys
Signed Subspace Keys are usually for sites that are going to change over time. For example, a website that may need news to be updated or information to be corrected, added or deleted. They work in such a way that someone else can’t put up a newer version of your site and pretend it was you who did it.
It works by using public-key cryptography so you can sign your site. Only the person with the secret key can add updated versions of your site to Freenet.
Also the SSK consists of five parts:
- public key hash – This part is all that is required to uniquely identify the file (but not decrypt it), so nodes need only store this bit. The actual public key is stored (unencrypted) with the (encrypted) data.
- document decryption key – This is only known to clients and not to the nodes storing the data, so nodes cannot decrypt the data they store without the full address.
- crypto settings – Cryptographic algorithm used, etc.
- user selected name – a word or sentence chosen by the site author.
- version – the current version of the site.
The version number is increased each time a new version of the site is created and inserted into Freenet. This approach is used since it is not currently possible to update already inserted data in Freenet. Updateable Subspace Keys makes this more transparent to the user, see below.
A typical SSK key looks like this:
SSK@public key hash,decryption key,crypto settings/user selected name-version
For example (cut for screen purposes):
SSK@GB3wuHmt[..]o-eHK35w,c63EzO7u[..]3YDduXDs,AQABAAE/mysite-4
How Signed Subspace Keys work
- The author generates a cryptographic keypair: a private key for signing files and a public key for verifying the signature.
- The author also generates a single symmetric key (one that is used for both encrypting and decrypting).
- When a file is inserted into Freenet, it is encrypted with the symmetric key and signed with the private key. The signature is stored with the file. Nodes don’t store the symmetric key, only the public key part of the SSK, as an index to the data. This is so they can plausibly deny knowledge of the data on their node.
The SSK is made up of a hash of the public key, and the symmetric key. The hash of the public key acts as the index to the data for searching purposes. Also, the actual public key is stored with the data. This is so that Freenet nodes can verify the signature when the SSK file comes into their node, and also so that clients can verify the signature when retrieving the file. The symmetric key is so that clients can decrypt the file.
Signed Subspace Key sites have largely been superseded by Updatable Subspace Key (USK) sites, which are based on SSKs but allow for links that try to always retrieve the most up-to-date version of the site.
Updateable Subspace Keys
Updateable Subspace Keys are useful for linking to the latest version of a Signed Subspace Key (SSK) site. Note that USKs are really just a user-friendly wrapper around SSKs, which hide the process of searching for more recent versions of a site.
A typical USK key looks like this:
USK@public key hash,decryption key,crypto settings/user selected name/number/
It is almost identical to the Signed Subspace Key, with the exception of the version-number. There are two types of USK addresses:
- an USK with a positive number at the end, or
- an USK with a negative number at the end.
The USK with a positive number at the end works like this: the Freenet node on your computer keeps a list of versions of USKs that it knows about, without necessarily storing the data as well. This list is built up from previous visits, and also background requests from previous visits to these kind of links. When you visit an USK like the one below, it consults this list for versions of the mysite site of number 5 or greater. If it finds any, it return the latest one. Then, in the background, it searches for newer versions that it doesn’t yet know about to add to your USK registry for the next time you visit the address.
Example (cut for screen purposes):
USK@GB3wuHmt[..]o-eHK35w,c63EzO7u[..]3YDduXDs,AQABAAE/mysite/5/
When you visit a link with a negative number at the end, Freenet searches for the version you requested (e.g. -7) plus four more (i.e. 7,8,9,10, 11) at the node on your computer and on other nodes. If it finds only version 7, it will return that. If it finds one of the others, it searches for another batch of five versions: 12,13,14,15,16. It repeats this until there are four consecutive versions it can’t find. Then it will return the latest version it has found so far.
Example (cut for screen purposes):
USK@GB3wuHmt[..]o-eHK35w,c63EzO7u[..]3YDduXDs,AQABAAE/mysite/-7/
The real treat with USKs comes when data is to be inserted into Freenet. But more on that elsewhere.
Keyword Signed Keys
Keyword-Signed Keys (KSKs) allow you to save named pages in Freenet. They are not secure against spamming or name hijacking. Several people could each insert a different file to Freenet, all with the same address. However, there is a collision detection, which tries to prevent overwriting of a once-inserted page. A KSK address looks like this:
KSK@myfile.txt
The drawback to KSKs is that anyone can insert a file with the same name as yours and divert traffic from your file to their own. The advantage is human readable links that can be easily remembered.
The KSK description should not contain slashes, just as with other keys ( slashes are used to denote Manifests or Containers).
A KSK address can contain a redirection to a CHK address, or it can contain the file itself.
Containers
A container, in general Freenet terms, is a file that contains several other files. In Freenet 0.7, a freesite, or other collection of files, may be bundled together in a ZIP file, which is limited in size to 2MB. Containers have the advantage that when you load one page you load all the files on the freesite, so either it loads in its entirety or it doesn’t load at all, and greatly reduce the number of keys required to insert a given freesite. Containers are currently created transparently when inserting a freesite using e.g. jSite.
Manifests
A manifest contains metadata over the list of blocks a CHK is divided into and some information about the content-type(MIME), the filenames and other useful information. The main information is whether the CHK-key is a splitfile or not, and whether the manifest is chained or not. You don’t need to know much about manifests in order to use Freenet, since it is a part that is handled internally.
Social
Freenet provides the foundation for anonymous email, forums and chat, as well as a replacement for Facebook/Twitter. Setup of these is described in the Freenet Social Networking Guide which can also be accessed over Freenet.
jSite
jSite is a graphical application that you can use to create, insert and manage your own Freenet sites. It was written in Java by Bombe.
You can download jSite here
Starting jSite
To start jSite, type the following in a terminal:
java -jar jSite.jar
The first window you see is this:
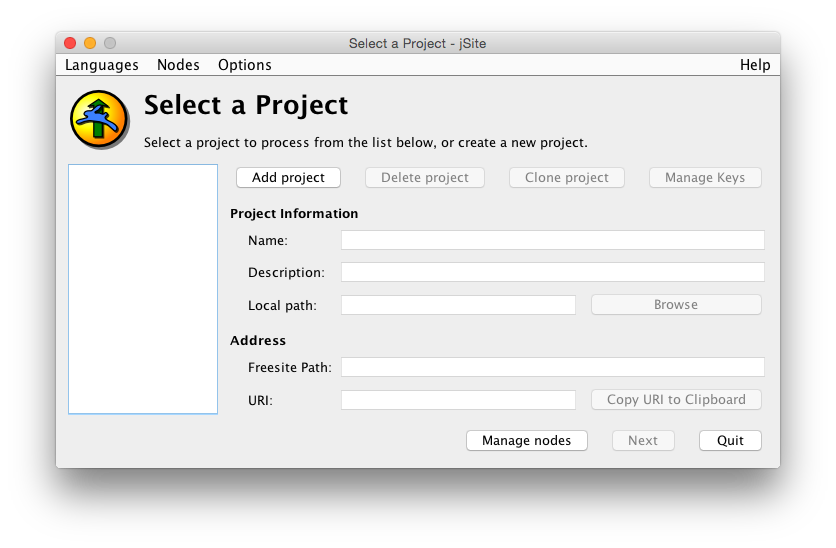
In the pane to the left, already created projects can be selected for updating, deleting or cloning. Since this is the first start, no such projects exist.
Creating a Freesite
To create a new Freesite, you click the Add project-button. You then need to fill in the details of the project. Under the Project information-section:
- Name – this is just a name for you to know the project, so anything will do. It may contain spaces.
- Description – again, just a slightly longer description of the project for your own convenience.
- Local Path – This is a directory where you will store all the pages of the freesite you are creating. Put in the full path. You can click the Browse button to select a directory graphically or just type it in.
Under the Address-section, there are some automatically generated entries, and the human readable name for the site, as seen in the address-field of the browser:
- Request URI – this is filled in automatically and should be a long string of seemingly random characters.
- Insert URI – this is also filled in automatically and will look similar to the Request URI.
- Path – You need to enter a single word here without spaces. This will appear at the end of the address of your site. You can’t leave this blank.
Below is an example of how it might look:
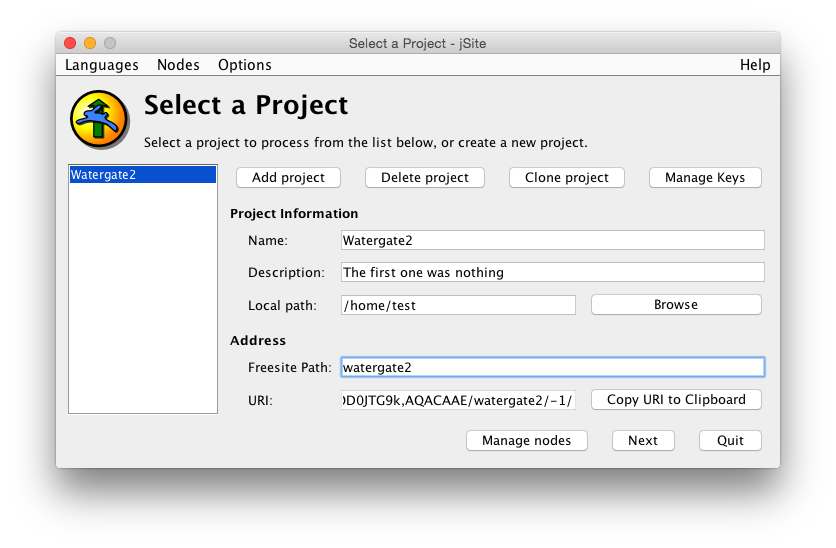
When everything is filled in correctly, you may press Next.
The next step is to add files to your Freenet site (or Freesite). This is done in the dialog called Project Files. Since we have no files in the current directory, yet, the dialog is pretty much empty.
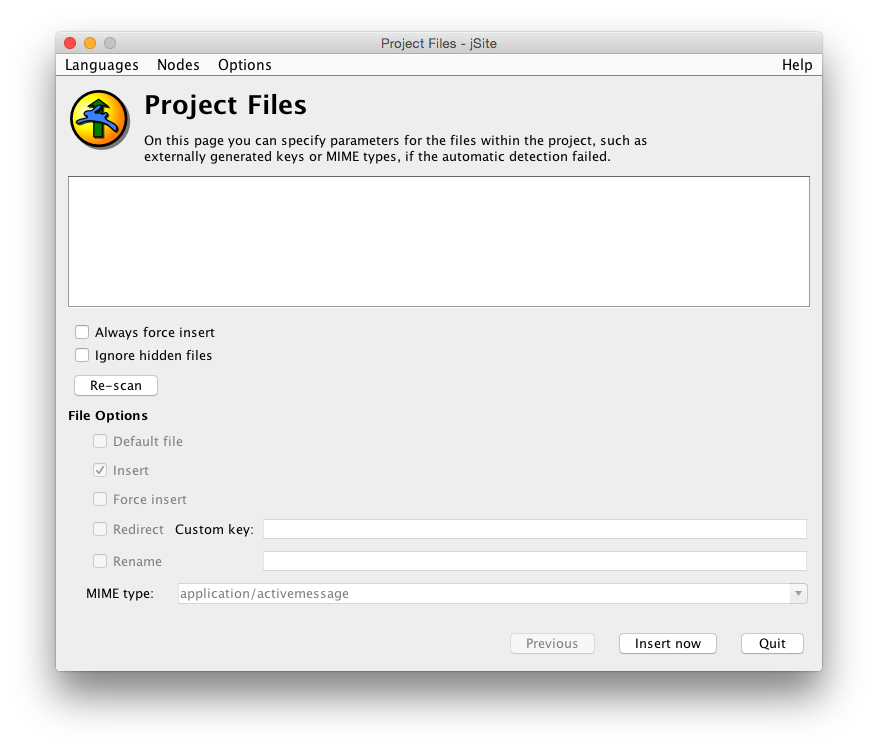
To add files, we put some files in the local directory we specified earlier, /home/test, and press Re-scan. Then, presto, the files appear.
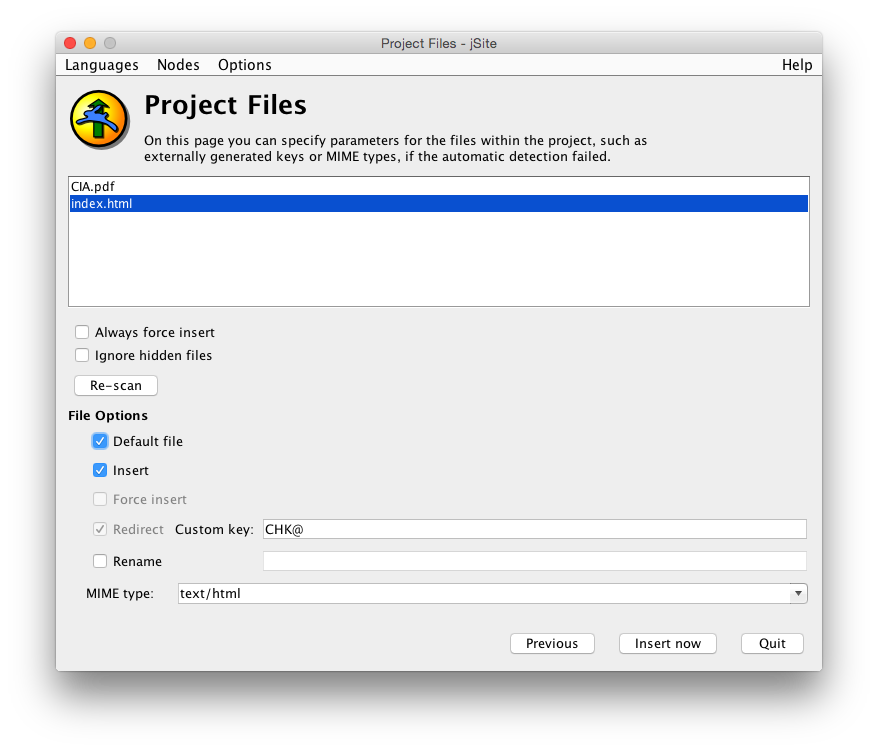
We then highlight one of these files that will be the default page (e.g. index.html might be a good choice) and check the Default file checkbox. It should recognise the MIME type as text/html, so leave everything else as they are and click the Insert now button.
If all goes well, a window like the one below should appear. It may take quite a while to insert the Freesite, several minutes in fact.
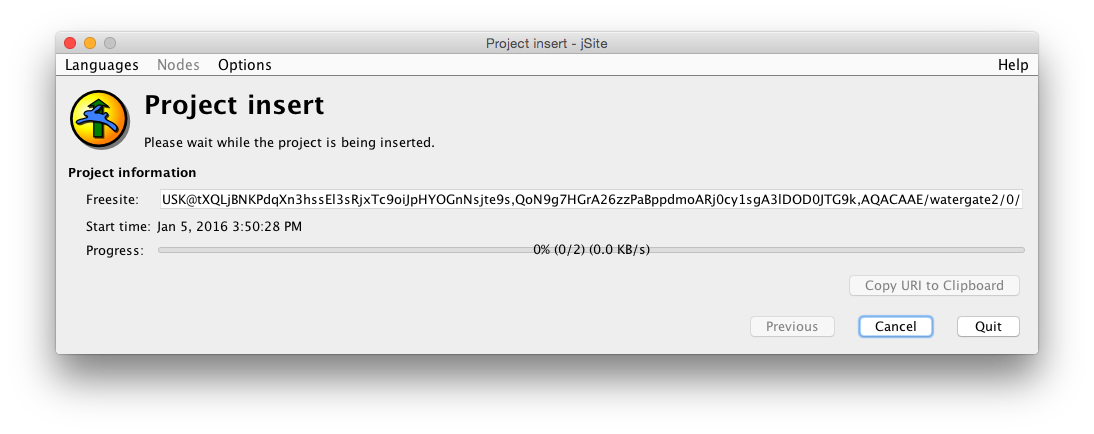
When all is finished, you will get a message pop-up that tells you that the site has been inserted successfully. You can copy the URI to the clip-board by clicking the Copy URI to Clipboard -button.
Then you can use FProxy to surf to your newly created Freesite. Just paste the URI after the
in the browser address bar, like this (cut for screen purposes):
http://localhost:8888/freenet:USK@cJNO6G0[..]joM,AQACAAE/watergate2/1/
If it works, congratulations, you have just created your first Freesite!
Wiki